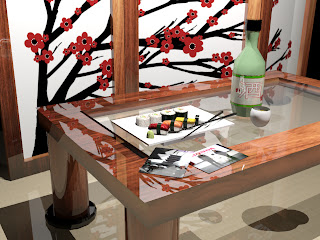
 So this week, I continue my work on the final project. I will start with posting the untextured 3d scene I have created earlier this week.
I thought that the cherry blossom picture on the divider was lacking last time, so I began by adding more branches and flowers to it in PS.
I realize I need to create rice for the sushi plate I am making in 3d, so I start by making it one and applying bevel and shadows to it.
Then I clone them, rotate them, and place them in all kinds of directions.
Finally, I clone batches of rice, and I have my final rice texture.
 Next, I need to create fish for the sushi, and create textures for the sushi rolls as well. I create these in Illustrator, various types of fish, and the long green strip will become the seaweed that is often served with sushi.
Time to open up Photoshop, apply textures, bevel, shadows, and gradients.
This is how it looks in 3d. Now, its not quite done yet. One of the neat things about creating in 3d software is that they allow something called bump maps. Bump maps are just that- they will create bumps for you. As pretty as smooth and glossy surfaces are, not everything is as smooth or glossy. With a bump map, you can add bumps to the existing textures to make things look more realistic.
Take this for example. This is just a image I created with Photoshop patterns. If you notice, it is in black and white. The white will tell the software to raise the bump up, while the black tells to raise the bump down. Varying shades of grey will give you something in between.
Same with the wood bump map. It is again, in black and white.
Final scene, note the bump maps applied to the cherry blossom divider, and to the coffee table.
I also added a couple of photographs from my trip. I hope to add trinkets, toys, and more photos for the final submission.
Also, a close up of the sushi plate so you can see more of the details.


No comments:
Post a Comment